Kitchen Pegboard DIY
I live in a condo. And that's great right? Yes and no. While I love where I live, it gets rather small. And like everyone who's ever lived in a condo, apartment or crowded house I needed more space.
The place that gets the most cluttered and crowded in my home is my kitchen since it is super tiny.
So, to give myself a little more space I decided to make myself a kitchen pegboard to hang all my pots and pans...and I'll show you how I did it.
To start, these are the materials you'll need.

1. 2' x 4' Pegboard (not pictured)
2. Peg Hooks
3. Spray Paint + Primer in the color of your choice
4. Drill and drill bits
5. Level
6. Tape Measure
7. Drywall screws and anchors
8. Hammer
9. Pen
10. Two 2"x1"x 4ft boards
I'm a simple person, I like more space, spending less money and also...being lazy. In keeping with that, all of these materials cost me around $40 at Home Depot. (not including the drill and bits which I already had, and which I'm sure you can borrow if you don't feel like buying one).
Oh, I said lazy right? That's where the paint comes in. I'm not patient enough to wait for both primer and paint, or to use a paint brush. This Rust-oleum paint+primer spray paint let me use only a couple coats of paint and Ta-Da! Board painted.


While the paint dried I put up the support boards. First I made the measurements to make sure the boards were about an inch from the outside edges of where the pegboard would be, then I installed the drywall anchors, a total of three per board, equally spread out.
Using the level to make sure they were straight (YES, laziness does have limits) I screwed in the supports.


Now, you may have noticed that these project was twofold for me. This wall used to house a home phone to the previous owner. Now my pegboard will cover that up, so if you have any walls that need covering...perfect project for you!
Next step is to screw in your pegboard to your supports, using the pre-drilled holes in the support boards.


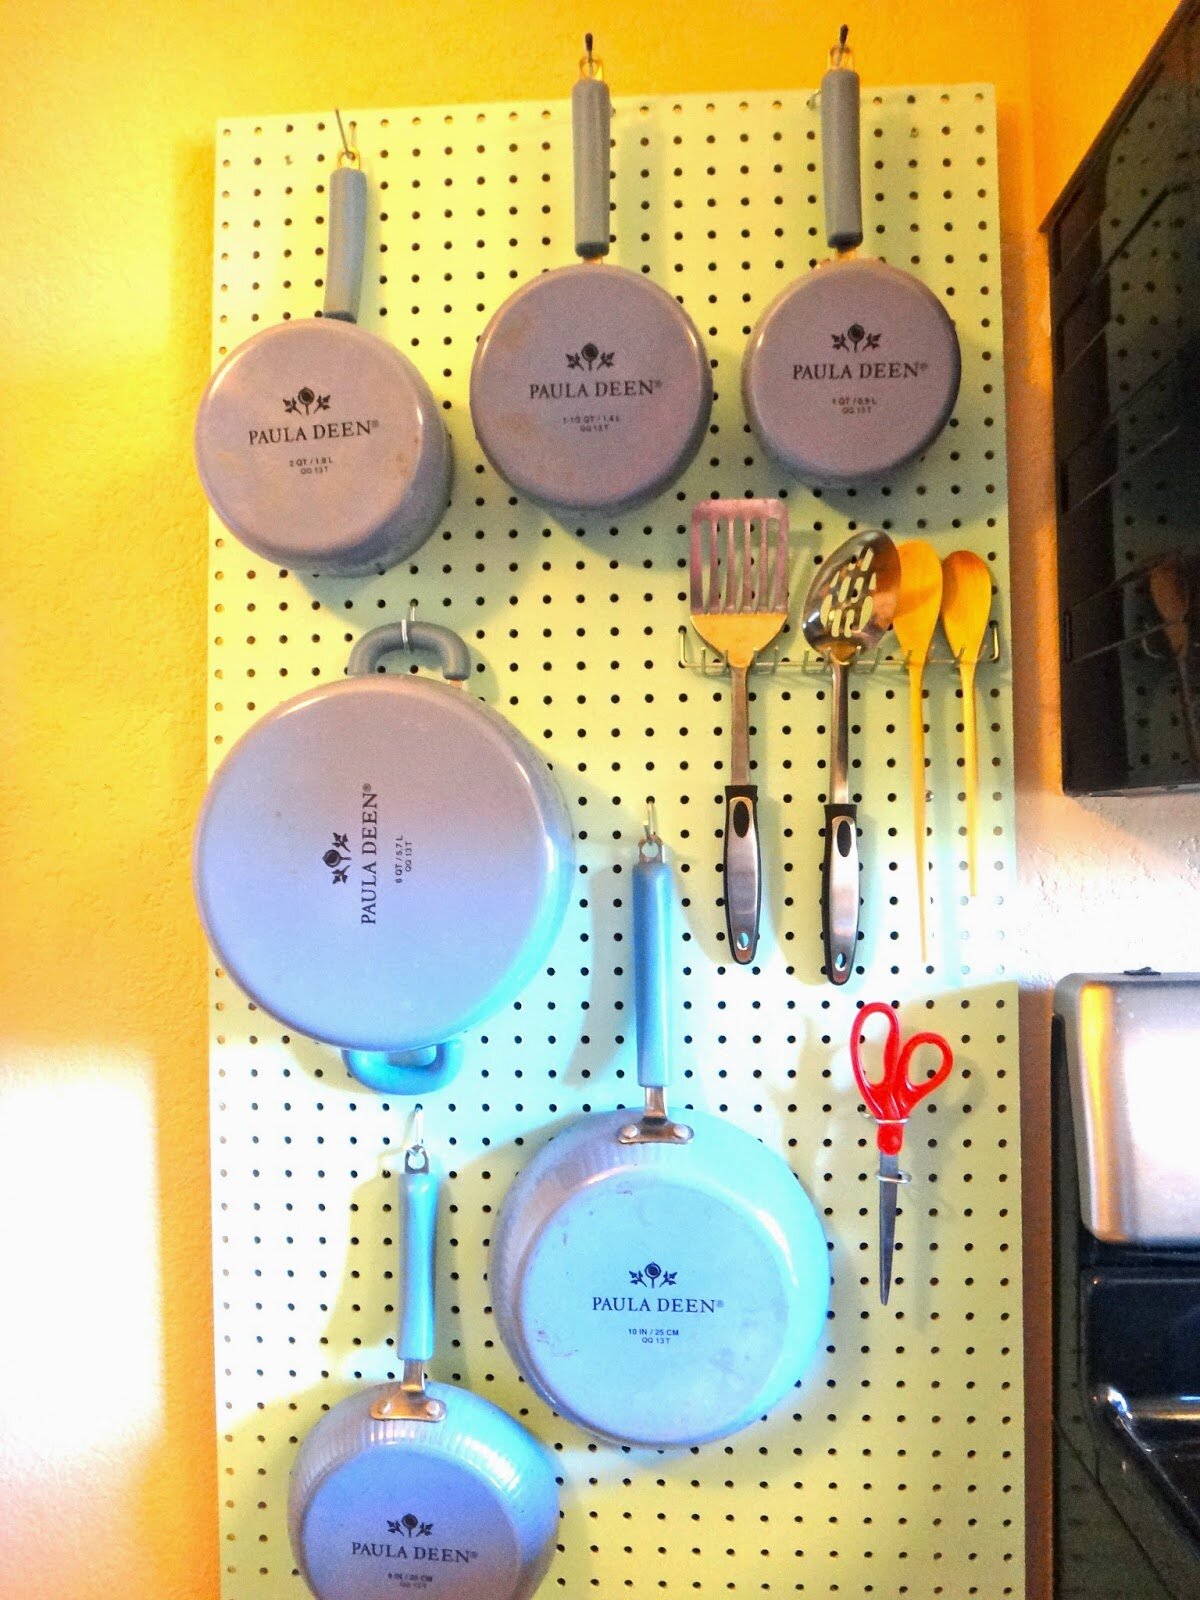
The last step is to put in your peg hooks and hang up all your pots and pans and whatever else you have that's cluttering up your kitchen.


Yep, that's it. Real simple. It took me about 4 hours to complete the project. And now my kitchen has so much more space. And I no longer have to wake the dead trying to get to the pot or pan that I'm looking for.
If you have any questions I didn't answer just let me know in the comments below! And if you have any space saving ideas, I'd love to hear them!!